Saturday, December 15, 2012

Canning Mistakes

As I promised I will now let you in a few mistakes I learned during my last canning session. But first I will show you a picture of what all I canned. Below is 6 quarts of chicken stock, 12 pints of clementines, 4 pints of sweet and sour chicken, 3 pints of orange chicken and 3 pints of lemon chicken.


Now on to the mistakes!

Mistake number one:

Just because you can't go to sleep do not get up and try to do a big canning session after you have been awake for 20 hours straight! That mistake alone will cause you to make other mistakes.

Mistake number two:

Check, double check and then triple check to make sure you have everything you need to complete a canning recipe. I did check twice and never realized that I forgot to get out the ginger I needed for the stir fry recipes I was canning. Maybe if I had checked one more time I would have realized it but then again the fact that I didn't goes right back to mistake number one. By the time I got to the stir frys I had already been up for 24 hours straight. If I had been rested I would have been a lot more alert to what I was doing.

Mistake number three.

Save the easiest canning project for last. If I had done the stir frys first instead of the clementines maybe I would have been more alert and remembered the ginger.

Mistake number four and the last thank goodness:

Just because you find a canning recipe on the net you think you will like does not mean you will like it. Make a small amount first to see if you even like it. I got the orange chicken canning recipe off the net and after all is said and done I do not really care for it. She had put slices of fresh oranges in her jars so I did to and found that the bitter flavor of the pith was so strong that is over powered the taste of all the other ingredients. From now on I will remove the peeling and pith before adding the orange slices to the jars. As for leaving the ginger out that was not to big a problem. I drained the liquid from the jar into a sauce pan, added some ginger powder and a little cornstarch, heated till slightly thickened and the ginger flavor came through, then added the rest of the jar to heat. It came out fairly well except for the bitter taste of the orange pith.

Well there you go. There is the canning mistakes I made the other day. I hope by my sharing them with you it will help you have better luck with your canning then I did on my last session.

Happy Canning ya'll.


Friday, December 14, 2012

Another Big Shopping Trip

I had planned all along to take the $66 I had left from last Fridays shopping trip to go this week and pick up 4 hams that Meijer's had on sale for 77 cents a pound. Well I hit the jackpot when I was given and extra $200 to spend to my little hearts content. So I sat down and spent an hour going over sale ads and writing out a list of what all I wanted to get.

Then yesterday morning hubby and I sat off to some friends house where he stayed with the hubby and his wife went shopping for me. We spent 4 hours going to 5 different stores and had a blast shopping and talking as we went. Below is a couple of pics of some of what I bought. I couldn't get it all in just 2-3 pics.


This is not all of it. There is about another $100 worth I never got around to taking pics of. I did splurge a little on some donuts and cheese cake but that is not something I do very often. One thing I learned along time ago is that if I do not allow myself to splurge every once in awhile then I will go crazy one day and buy a lot of junk food. LOL

After I got done putting all this stuff away I took out the three chickens I had in my refrigerator, cut them up and packaged them in to meals for the freezer. I did the same with the big package of bacon I had in the refrigerator and one of the hams. There are now 50 meals worth of meat sitting in the freezer now and some meat that I canned early this morning and I do mean early. Couldn't sleep last night so got back up at 2 am after going to bed at 12:30 am and started canning.

Tomorrow I will show you what I canned and tell you about some mistakes you never want to make when canning. You may get a laugh out of one or two of them. :)


Tuesday, December 11, 2012

Winter Wonderland

This morning we woke up to our first winter wonderland of the season. Thought some of you might like a look at it. Doesn't it look so pretty? It always does until you have to get out there and shovel it which I have to do later if I can. LOL

If I could have one wish I would wish that snow was only allowed to land on the grass and not on sidewalks and roads. Yeah like that will ever happen!! LOL

Any way hope you enjoy a couple of pics of our winter wonderland today. We got about 2-3 inches.

 
I hate that orange fence hubby put around the garden but it was the only thing he had to keep out our two stubborn pekingese who like to snitch the tomatoes and green peppers. I told him that it was not going to keep them out and he found out I was right. The little stinkers chew right through the fence and had a blast getting fat on the fresh garden goodness. Guess they wanted to eat healthier to. LOL
 

Beef Stew & Pot Roast

At the buy one get one free sale they had English roasts on sale for buy one get one free. I bought a total of four. Saved $17 doing so. I knew before I even bought that that I wanted to use them to can up beef stew and pot roast. Same for the red potatoes and carrots that I bought at the same sale.

As soon as all the food was put away that day and before started canning the oranges I cut all the roasts up into one inch chunks, removing as much fat and grisle as I could. I froze all of the meat in a gallon zip lock bag. Early Sunday morning I took the meat out of the freezer and placed it in the refrigerator to thaw in time for Monday morning. And on Sunday night I gathered all the canning equipment I would need to start canning early and peeled and cut the carrots so the next morning I could start in right after we had breakfast.

Right after breakfast I peeled the potatoes and cut them into chunks and placed them in water to keep them from turning black. Set all my ingredients and canning equipment I needed on the table and got the water heating. I browned half the meat in a tiny bit of oil and then placed it on a paper towel covered platter to drain.


I started with the meat, placing it in the jars then I added some drained potatoes and carrots to each jar. I added two teaspoons of beef soup base, a pinch of dried thyme, two tablespoons of V-8 juice to each jar, added boiling water and wipe the rims, added the two piece lids and placed the jars in the pressure canner. I processed them for 90 minutes at 10 pounds pressure which is what is called for in my area.


After the canner had cooled down I took the jars out of the canner and below is what they looked like.


When I go to use the beef stew I will drain the liquid out into a pan, add a little corn starch slurry to make a gravy then add the meat and veggies so they can heat through. Then  serve with homemade biscuits.

As for the pot roast it was a lot simpler to can. I boiled the meat until heated through. Placed the meat in the jars, added drained potatoes and carrots. Added the boiling beef water from meat, wiped the rims of the jars and added the two piece lids. Placed them in the pressure canner and processed for 90 minutes at 10 pounds pressure. I added no salt as my family prefers the sweetness the carrots give the meat over a salty taste. Also because I like to control the amount of salt that goes into our foods.
I did not add salt to the beef stew either because it will get all the salt it needs from the soup base and the V-8 juice.

Here is what the pot roast looked like when it was done.

I know they look similar in appearance but there it a difference which you can see below. And the taste will be quite different between the two. I got a total of 7 quarts of beef stew and 6 quarts of pot roast from the four roasts, 10 lbs of potatoes and 1 pound of carrots. Each jar will need at least 2 adults unless you have a big eater like my son then he will have to have a quart on his own. He is 6'4' and I swear he is always empty from the toes up at meal times. LOL

 
Oh and here is a picture so you can see the difference between the beef stew and the pot roast.

Hope you all are enjoying reading my canning adventures. I will be doing more later this week and will show you those when I am done. My next adventure will be using chicken.

Sunday, December 9, 2012

Making the most of my food dollars

I was going to post this tomorrow but decided to go ahead and do it tonight because I have another canning project tomorrow and may not have much time for the computer.

I hate food waste. Every time I see one bite of food go into the trash I see money being thrown away. For years there was not to much I could do about some of the food that was wasted since I was working a full time job outside the home. Between work and travel time I was putting in 60-70 hours a week away from home either at work or on the road. Then back in 1994 I was hurt in a car  accident and was no longer able to do the work I had been doing for almost 17 years. And having teens at home eating when they wanted.

But all that changed when I could no longer work. I went back to the frugal ways I had learned as a child watching my grandma and my mom. My grandma could take little bits of this and little bits of that and make a mouth watering, belly warming meal that was also very filling. You never walked away from her table hungry unless it was your own fault because she was a great cook.

By watching my grandma I learned to always scrub vegetables before peeling instead of throwing the peelings away, save them up in the freezer until I had enough to make a big pot of vegetable stock which then was canned. She would save potato peeling, carrot peelings, celery tops, onion peelings and any other veggies she prepared for meals in freezer boxes in the freezer. When she had enough she would make a big pot of vegetable stock and then either can it as is or turn it into a big pot of soup which she would then can.

Lately I have been into canning more and more and in the last year have gotten into canning fresh citrus. I was heart broken every time I throwed all those peelings from oranges, grapefruit and lemons away until this last time when I had a light bulb go off in my head. Yeah that does happen to me every once in a great while. LOL

I decided this time I was going to try to dehydrate any citrus peelings from the fruit I canned this year. On Friday night when I peeled the oranges for canning I carefully peeled the peel off with a very sharp knife leaving most of the white pith still on the oranges. I put all the peelings in a bowl, covered then with lid and placed them in the refrigerator until yesterday morning. When I got up yesterday I took the peelings and laid them out in single layers on my Excalibur dehydrator. I filled up 8 trays. Set the temp for 135 degrees and plugged it in.


Don't they look so nice and pretty with their bright orange color?


This shows you just how little of the white pith I left on the peelings.


After drying for 6 hours I took them out of the dehydrator. They were nice and crisp but still had a lot of their orange color.

 
All eight trays dumped on to one tray.
 
After they all cooled I ran them a few at a time in the blender to grind them into orange zest for baking and cooking. After all the peeling were ground up I came out with almost a pint jar of orange zest. Seeing as a tiny bottle of zest in the store can be pretty pricey I think I came out on the better end of the deal for the little extra time I spent carefully peeling the oranges and running the dehydrator.
 
 
I was giving a bottle of vodka by my uncle when he moved in with us and since we don't drink I had put it up and forgot about it. I remembered I had it while I was peeling the oranges the other night so I pulled it out and pulled out three small canning jars. I put some of the fresh peelings into each jar and then pour in enough vodka to cover the peelings. So I shook it up a little and sat it in a cool dark place. I opened on today and smelled it. It already has a good orange smell so of course I had to take a taste. It does have a taste of orange but not as much as I want so am going to let it sit for a few more weeks before using it. I have a feeling this is going to come out tasting great!


Now if only I could find a use for all that white pith I threw away I would be very happy. Then there would have been no waste at all from my canning oranges. :)

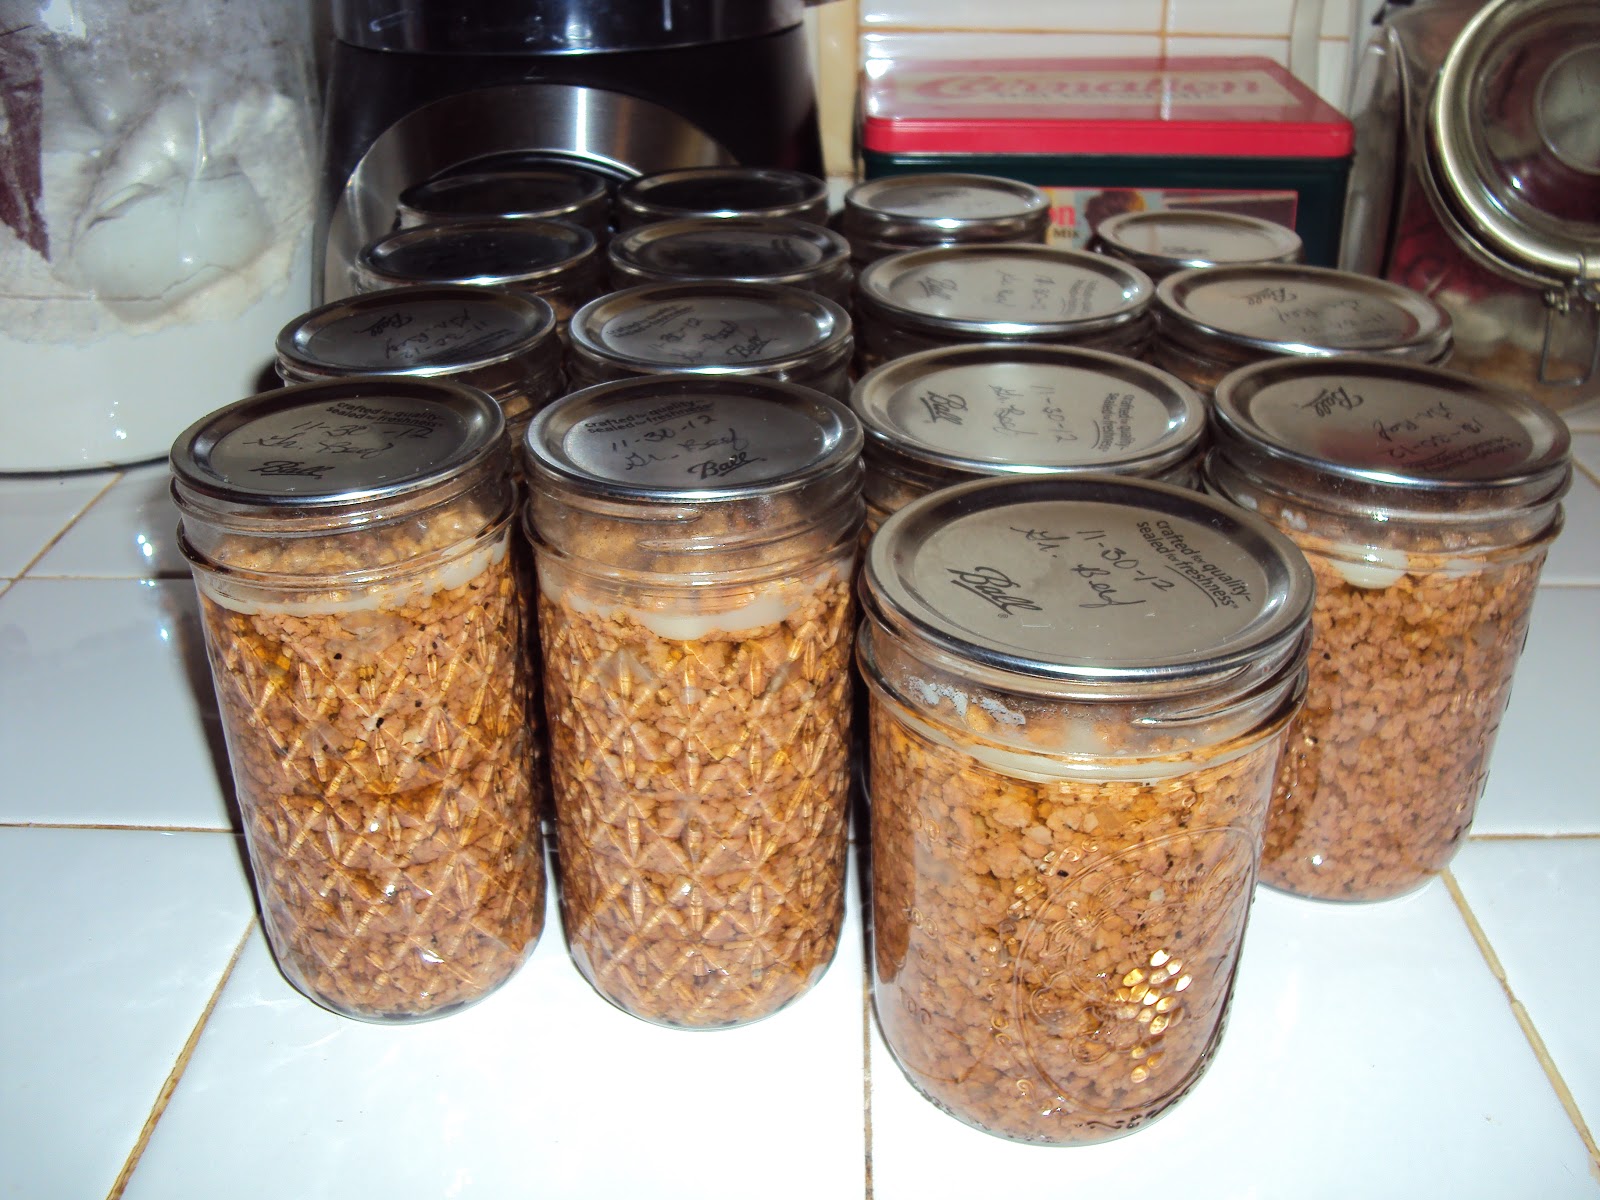
Not bad from $9.98 of oranges is it. I got 4 quarts, 6 pints, one half pint of canned oranges, almost a pint of orange zest and a pint of orange extract for my money. Think I got my moneys worth on this deal?? I sure do!

Canning Oranges

Last Friday hubby and I went grocery shopping at our local store because they had a good buy one get one free deal on lots of items. One of the deals we picked up were 4 pound bags of oranges. We got 4 bags. I knew what I wanted to do with them. I wanted to can them up so during the summer months when oranges are more expensive I would be able to save by opening one of our jars instead of buying oranges at the more expensive prices and still give my family the vitamin C they need. Out of the four bags of oranges we bought I got a total of 4 quarts, 6 pints and one half pint of pretty and oh so yummy orange slices to store in my pantry for this summer. Don't they look pretty to you to?


Here is a close up on one of my pretty jars of golden sunshine.


The reason I used quart jars and the half pint jar is because I am running out of pints. When all my kids were still at home I canned everything in quart jars so I have many more of them then I do pints. Now with just the 3 of us at home I am starting to can more in pints but haven't gotten enough of them stocked up yet. Working on that as I can afford to.

To can the oranges all I did was to wash the oranges really good in a light soapy warm water then rinsed well. I wanted to make sure there was no chemicals left on them. Then I peeled the oranges, using a very sharp knife, keeping the outer peel as thin as possible for later use, leaving most of the white pith still on the oranges. After peeling off the outer layer I then peeled all the pith off the oranges. Then pulled the sections apart.

I made a light syrup from water and sugar. Keeping the syrup hot while I packed the sections into hot jars I filled the half the jars, wipe the rims, applied the 2 piece lids and placed the jars into the boiling water bath. Processed them for ten minutes then removed them. Finished filling up the rest of the jars and placed them in the hot water bath and processed them for ten minutes.

Now my jars of pretty golden sunshine are sitting so pretty on the shelf in my pantry waiting for this summer when we will be enjoying them as is or mixed in fruit salads. I just love oranges don't you?

Check back tomorrow and see what I had in store for all those peelings I saved from the oranges. :)

Saturday, December 8, 2012

Our Shopping Deals for Yesterday

This week our local store had a lot of good buy one get one free deals. I wanted to go to this sale but since I have been really sick this week hubby went with me so I could get in and out faster. I took time to make two lists and we divided the store in half. He took one half and I took the other. We met up at the check out lane to check out together. Here is a pic of hubby showing off our haul for this week. LOL


Please forgive the mess in the background. Hubby has been doing most of the kitchen duty this week and he doesn't always know where I keep things. But bless his heart he has been trying. :) Almost every thing on the table was a buy one get one free deal. Except for the meds (for me), his bag of popcorn, canning lids, milk, cheese, syrup, mustard, carrots and green peppers. Oh and the silver bag of coffee which is a restaurant blend that they had that was $4 cheaper then the same size can of Folgers.

Before we went shopping I spent a couple of hours going through the sale add and planning meals around what was on sale. All total for the 3 of us there is enough here for a month's worth of meals including using some things we all ready have in our pantry.

Because we do live on a limited monthly income I plan one big shopping trip a month to save on gas so I do not by just what I need for that month. I just plan a months worth of menus and then buy enough to make those meals but those meals may be cooked 2-3 months down the road. By doing this it has helped me keep my food bill down considerably each month. Some months I may spend as high as $200 and some months I may spend as little as a $100 and still have enough to feed all 3 of us 3 meals a day for the month. Not to bad considering the rising food costs lately.

Below is some close ups of what I bought. The English Roasts were buy one get one free and so where the pork steaks. The cheese sausage were in the markdown bin for $1.69 a package and they are normally $4.29 a package. They still have a week to go on the sale by date.


The oranges and two different kinds of potatoes were also buy one get one free.


The total it would have cost me was $197.64 if I had paid full price of each of the items. Actual cost for me was $131.15 saving me a total of $66.49. Not bad is it? Check back starting tomorrow and see what I have planned for some of the items we bought yesterday. Since I budgeted $200 for food costs this month I will be going to another store next week after Hubby's doctor appointment and seeing what more deals I can find to feel the pantry with. :)  Who knows! Maybe I will find some really good deals on baking stables.

Thursday, December 6, 2012

Canning Blueberry Syrup

A couple of weeks ago I was given a 2 quart bag of frozen blueberries. I didn't need any more for pie filling since I canned a bunch of that back in June so I thought about just using them for pancakes and muffins. Then I realized I had enough blueberries in the freezer to last me a year for them. So the only other thing that came to mind was the fact that I love blueberry syrup on pancakes and waffles. I pulled out my every so handy canning book and low and behold there was a blueberry syrup recipe in there.

I have been sick for the last 4 days with strep throat and even if I didn't feel any better this morning when I got up I figured I need to do something no matter what it was so I decided to make the blueberry syrup. So I started pulling on what I need to make it.


Here is the start. A stainless steel pot, 2 quart measuring cup and 2 cups of water. First I measured the blueberries to make sure there was two quarts of them.


Yep there was! Then I poured the berries in to the pot, added the two cups water, placed them on the burner and brought them to a boil. As soon as they started to boil I reduced the heat to a simmer and let them simmer for 5 minutes. Then I crushed them with a potato masher.

 
Juice before straining
 
 
After straining.
 
After crushing them I strained them through a damp jelly bag. Washed to pot, put 4 cups water into the pot along with 3 cups of granulated sugar; boiled it to 230 degrees , added the blueberry juice and 1 tablespoon grated lemon peel. Boiled for 5 minutes. Stirred in 2 tablespoons lemon juice and ladled the syrup in to hot jars.
 
 
All ready for the two piece caps!


All nestled in their hot bath ready to be boiled for 15 minutes!
 
 
Here they are. All 10 lovely half pints of blueberry syrup! I see lots of pancakes and waffles in our future with some lovely blueberry syrup and butter on them. YUM!!
I would share but you all know how it is. Just can't let something this good go any where other than my tummy. LOL

Saturday, December 1, 2012

Canned Chili

 
 Of the 20 lbs of hamburger I bought this week I took 10 pounds and made chili to can. I used dried red beans which I cooked in the slow cooker before make the chili, onions, green peppers, chili powder, cumin, garlic, a little cocoa powder ( yep I said cocoa powder), canned diced tomatoes and tomato sauce. When the chili was done I took enough out of the pot for us to have for dinner that night and the rest went in to quarts jars and then into the pressure canner. I got 12 beautiful jars of chili (one of our favorite cold weather meals) plus one meal from the 10 pounds of hamburger and 4 pounds of dried red beans.  We eat chili at least 3 times a month. :)

The cocoa powder may sound funny in chili but it just adds this special little touch to chili. You don't add a lot. I added 2 tablespoons to the big pot I made. So really that is not much. :)


Here is my 12 lovely quarts of chili all ready to go back in the box and in to the pantry. These will come in really handy when hubby or son needs to cook a meal. :)

Because hubby and I are both disabled ( he is in worse shape than I am ) I try to keep quite a few fast, easy fix meals on hand for times when I am really busy or not feeling well enough to put a meal together from scratch. We do not eat out much so these jars meals up a lot. Even on the budget since I only can things that I grow myself or can buy at a really good price.

But I have more reasons why I can. I remember eating all the delicious foods my grandma canned all the time and seeing all those pretty jars lined up so nice and neat in her pantry. There never was a time you could go into the pantry and not find some thing good to eat. Since my grandma is gone now I can always open a jar of my own home canned foods and the memories of her and all that food come flooding back. Sweet memories that I never want to forget. :)

Canning Hamburger


Our local store had ground  hamburger on sale this week for $1.99 a pound so I bought 20 pounds to can. I used less than 10 pounds which I fried along with some fresh chopped onions, salt and pepper. When the hamburger was cooked I drained it all through a mesh strainer and then rinse it with hot water to remove as much grease as I could. Packed the meat into jars, covered with some beef broth, wipe the rims, added lids and rings and processed in a pressure canner for 1 hour and 15 minutes. It came out great. I had used some of the hamburger from the 10 pounds to fix hubby and I hamburgers that day for lunch so I only got 8 -12 oz jars and 8 pints of hamburger canned up. These will come in handy for busy days when I want a fast fix meal. I can open one of these and make spaghetti, sloppy joe's, lasanga, home made hamburger helper, quick pot of hamburger soup or any other dish that uses precooked hamburger in it. I love have fast fix meals on hand and an extra bounus is that hubby or son can put together a nice meal if I am sick with just a little help from me. :)

BTW one jar is missing because it didn't seal so its sitting in the ref. for tomorrow's dinner. Waste not want not my grandma always taught me! :)


Saturday, October 13, 2012

Chocolate Gravy, YUCK!!

Hubby is a true southern boy and I am a true Yankee girl. Our kids were born Yankees but you would think they were born and raised southern with the way they love Chocolate gravy. I am the only member of the family that hates the stuff yet I am the only one that cooks it. How in the heck did that happen?? LOL

Anyway the other day hubby wanted Chocolate gravy and biscuits for breakfast so I got roped in to fixing him some. Here is the results.


As you can tell by the steam rising off them they are good and hot. Now if only I could figure out the health benefits of eating them. I have been trying to figure that out for over 35 years and still no closer to knowing then the first time I learned to make them. Hubby's dad taught me how to make them.

What is surprising is that I am a chocoholic and I can't stand Chocolate gravy. Could it be the creamyness of the milk that I am missing since Chocolate gravy is made with water instead of milk? One may never know but as long as it makes hubby happy to have his Chocolate gravy and biscuits who and I to argure. :)

Canning fresh caught Salmon

Hubby and his brother went salmon fishing on Thursday. Here is a couple of pictures of their catch. They were really proud of their catch of the day. :)


The biggest one was a female and she was loaded with eggs. The smaller one is a male. The guys cleaned and filleted the fish so all I had to do was can it. First I soaked the fish in a brine of one gallon cold water mixed with a cup of canning salt. Then drained it for 10 minutes. I then cut it up into jar size pieces and packed it in half pints jars really tight leaving a one inch headspace. I processed them for an hour and 40 minutes at 10 lbs pressure. Here is a couple of pictures of the finished product.


Looks pretty good doesn't it? And think of the savings! A 6 oz. can of skinless, boneless salmon costs around $2.49 where I live. After I factored in the cost of the salt, water, lids and gas for the stove I figure it cost me around $6 to can it and I got 13- 8 oz jars of skinless, boneless salmon. Not a bad deal is it?

I didn't factor in the cost of gas for them to go fishing, the cost of their fishing license or the cost of bait because they were going go fishing even if they didn't catch anything. LOL They are going back in a few days to see if they can catch some more. I am hoping for 4 more to can.  I can see a lot of nice salmon patties in our future. :)

Tuesday, October 2, 2012

Hot Roast Beef Sammies-YUM!


We love hot roast beef sammies with mashed potatoes and gravy. Its one of our favorite comfort meals on a cool fall night or cold winter evening. Add some hot maple glazed carrots and a side salad and you have got yourself one nice tummy warming meal.

I made the roast beef sammies and gravy from a jar of rump roast that I sliced and canned in beef broth last year. A quart jar of the meat will feed 4 adults unless you gave got one 6ft 4 inch hallow from the legs up, son in the house. Then you are lucky is there is enough for 3 adults. LOL

.
To can the rump roast, I sliced in half from one side to the other because it was too thick as is. Trimmed off what little fat was on them then sliced each half in to 1/4 thick strips. I browned them all in just a tiny amount of olive oil then drained the slices on paper towels to remove as much of the oil as I could. I had made up a beef broth earlier using low sodium beef soup base. I put the strips in quart jars then covered with the hot broth leaving a 1 inch head space. Wiped down the rims and placed the lids and rings on the jars. I then placed the jars in the hot water that was in the pressure canner, put the lid on and processed them for 90 minutes.  As you can see from the picture above what little oil and fat that remained floated to the top and semi hardened. It didn't hurt anything.

When I opened the jar to made the hot roast beef sammies I scooped out the fat and then just poured the broth into a skillet, added two cups water because the broth was a little to strong, brought it to a low boil and then added a slurry of cornstarch and water. Once it started to thicken I added the meat in carefully as I didn't want it to fall all apart. I let it simmer on low heat for 15 minutes. When I was ready to serve it I laid 2 pieces of bread on the plate and cut them in half, I removed the top slice, using a slotted spoon I place some of the meat on top of the first slice then added the top slice. Scooped the potatoes between the two halves and then ladle gravy over both. It was yummy and the family didn't leave any left overs. :)

This was my last jar of home canned rump roast so next time I catch rump roast on sale again I will have to buy 4 or 5 more to can. I love having home canned meals at the ready for those days I want and easy cook day. :)

Attack of the Poison Ivy Brigade


As you can tell by looking I was attacked by the Poison Ivy Brigade. They were sneaky devils! I have spent the last 40 years outsmarting them but finally this fall they got smart and sought revenge with a vengeance on the mean evil lady that has been ripping them out by her bare hands for as long as she can remember.

I guess they didn't like being evicted from their warm and cosy home at the back of our garage. It ticked them off to have their roots ripped out of the nice warm earth and their long reaching tendrils off the back of the garage. They must have really loved having their roots in up next to the coolness of the cement of the garage floor and the morning shade they had each morning and the warmth of the sun each after noon.

I don't blame them for loving their home. But you would think after being evicted every year for the last 17 years they would have given up and found a new home. But not these devils. They are bull headed and persistent. Quite like the meal old lady that keeps trying to evict them for good. She will not give up her fight with the poison ivy brigade and she has sworn to all who will listen that next year she will be back to fight again only this time she will bring more weapons to the battle. She will never way the white flag of surrender. She vows to keep battling the brigade until she renders on to them the ultimate defeat and they move on to greener pastures in some one else's yard.

In the mean time she is nursing her battle scars and taking notes on war strategy so that next year she is better armed to do battle once again the Poison Ivy Brigade. She may be covered from her head to her legs with her battle scars but she is stubborn and bull headed she will return to the battle and sooner or later she will triumph in the end. War may be hell but winning the battle is sweet!

Monday, October 1, 2012

Prepping for survival in a post SHTF world


I do not hide the fact that I belief that life as we know it will soon end on earth and we will be forced to live much like our ancestors did back in the 1800's. Even Hollywood seems to think that now with the rash of survival type shows that they are coming out with. Shows like Revolution, Last Resort and of course all the end of the world movies like 2012.

Personally I am not a believer of the Mayan calendar and a lot other far fetched ideas that some people have but I do believe that because of what is going on between nations today that things will happen that will shut down the world's power grid and force us all back into a world of darkness. Money will be worthless, cars will no longer run, stores will no longer be opened. There will be no way to buy what you need nor will you have a good chance at finding it since looters will be running rampant because they did not prepare.

But there is even more good reasons to do everything you can do to prepare for survival. Mother Nature is a prime example of why it is good to always be prepared for survival. Earthquakes, tornados, hurricanes, ice storms, blizzard and more can take out power for weeks, close stores and gas stations for weeks, Freeze water pipes, contaminate the local water supply, ruin crops and more. All which can result in unprepped people having next to nothing the way of resources to survive until things are back to normal. That is not something I want for my family. So I do what I can to prep for my family in hopes that they will be able to survive until the world returns to normal or a new normal sets in.

A big part of my prepping includes owning a prep/survival group so that I may gain and share knowledge with others that are like minded. We talk about everything to do with survival from learning how to cook over and open fire to how to raising our own meat animals, to gardening and perserving our harvest. If you are interested in learning more about prepping for survival or if you have knowledge that you would like to share I would like to invite you to join http://groups.yahoo.com/group/hardcorepreppers2/

Its a good group to join and you find lot of friendly people who are like minded when it comes to prepareing for a future that may be completely different than what we live in today. I hope to see you there.

Friday, September 28, 2012

Dried Mushroom Powder

About a month ago Meijers had 8 oz packages of mushroom buy 10 for $10 and get one free so I got 11- 8 oz packages of mushrooms. They were some nice looking mushrooms weren't they?


I wiped them all clean and sliced them, placed then in the dehydrator.


That's a lot of slicing. LOL


All nice and dried and waiting for the next step. I ran them through the food processor and ground them up pretty good but still not as fine as I wanted them so I ran them through the blender after that. They came out nice and powdery. Makes a great addition to soups, spaghetti sauce, soups and more when you have family members who will not eat anything with chunks of mushrooms in it. LOL My son will not eat mushrooms, little does he know that he has been eating them for months. I know I am a sneaky mommy!! LOL


The finished mushrooms on top. I put about 2-3 teaspoons in things that I cook.
Below the mushrooms is dried celery. Meijers had them on sale 10 for $10, get one free just like the mushroom. I got 11 packages of them, washed the celery, diced it and then dehydrated them. This was I can get celery in my hubby because he doesn't like celery but if they are really small pieces he will eat them.
And these will be good for a year.


Easy Peasy Stuffed Turkey Rolls


I haven't been able to blog for awhile because my garden finally came in so I have been busy canning. Plus I was busy caring 24/7 for a disabled uncle. His dementia and sundowners was getting worse and wearing me out. He went into a nursing home last month because I could no longer care for him 24/7 I am sorry to say.

For dinner tonight I made stuffed turkey rolls, mashed potatoes, mashed sweet potatoes, home canned green beans and opened up a can of jellied cranberry sauce. The men folk must have really liked it because they cleaned their first plates and went back for seconds. LOL

A couple of weeks ago our local store had Jenni O turkey tenderloins on sale for buy 2 get 3 free. I got 10 of them total. I took one package today and sliced the tenderloins in half from side to side, end to end. Pound each one out a little between two pieces of plastic wrap to make them about a 1/4 inch thin. Then I took some store brand chicken stuffing mix, made it up and put two scoops on each piece of turkey, rolled them up and secured them with a tooth pick at each end. Place them in a casserole dish and then placed the rest of the stuffing in the middle. Placed in a 350 degree oven for 45 minutes then took them out, opened a jar of roast turkey gravy, spooned it over top of everything and placed back in the oven for another 15 minutes at 400 degrees.


Before cooking of course. :)


Lookin good!! YUM!!!


Tender, moist and oh so yummy!! :)

An easy peasy Thanksgiving style dinner for any day of the week. Have I made you hungry yet?